Have you ever found yourself staring at an audio compressor asking yourself what all those controls do?
Or maybe you’ve had a stab at trying to use a compressor whilst recording an instrument, wildly and randomly adjusting the controls, hoping for the best?
“Mastering compression is the difference between your recording sounding like a demo or sounding like the great albums of all time.” – Ronan Chris Murphy
What is Compression?
When we talk about compression in audio we are talking about reducing dynamic range: Taming the peaks (limiting) of an element, enabling us to bring up the quieter parts (expansion.)
Compression, or rather dynamics are our greatest weapon when it comes to making a great recording. To use a compressor, expander, noise gate or limiter effectively, it’s important to have a basic understanding of the common functions that appear on such devices.
Taking some of the pain away trying to understand the art and science of dynamic processors, you’ll find below a very brief overview of the basic controls of any dynamic processor. Have a read and then have an experiment. Let me know what settings work great for you in the comments section below.
Threshold/Input Gain
Threshold, measured in dB, determines at what level your dynamics processor is to kick in to action. Your processor is otherwise waiting to react. On some units threshold is a ‘fixed’ value (and therefore there is no ‘threshold’ control.) On such units, you may find an ‘input gain’ control which simply raises or lowers the input level allowing the signal to find the threshold.
Attack
Attack is all about how quickly it takes the dynamics processor to start fully processing the input signal once it achieves or exceeds the threshold. For percussive blasts or rhythmical explosions you might want to choose a slow attack over a fast one, allowing the transient waves through (the initial waves that give an instrument or element it’s character.) A fast attack will smash down explosive transients allowing you to turn up the level of your track, giving a more ‘compressed’ sound. For a consistent low end you may choose a faster attack with a longer release time.
Release
Release determines how long the compressor will keep working on the input signal once it has been activated. You may prefer shorter, or quicker, release times to experience sustain or a low end thud (think ‘pumping’ music.) Faster release times can also be used for choppy passages, for example, when you want to tighten up low end on heavy rhythm guitar. For a solid and consistent low end you may choose to use a slower release time. The device will keep working on the signal until the release time has been achieved.
Ratio
On a device that handles compression, this is where the output level of the louder sounds is lowered – by a ratio. The higher your ratio, the more compression applied. For example a 10:1 ratio means that for every 10dB input level you get 1dB of output, over the threshold level, from the processor. A 4:1 ratio means 1db output for every 4dB over the threshold and so on. Generally, you would use a lower ratio to experience the details and dynamics of an instrument or element. Higher ratios ‘squash’ the sound to the point where you can ‘nuke’ the sound as some engineers do on drum elements, for example.
Make-up Gain
Make-up gain is a control that raises the level of the signal, once it has been processed, to the desired level for the next stage of the signal. Without it, there would be some level mismatch between both the original and processed signal. It’s not to be confused with Output Gain although you will find units out there with one, the other, both or neither controls!
Output Gain
Some units, such as the TL Audio Fat Man Tube processor have both output gain and make-up gain. The key difference between these two controls is that the make-up gain is only ‘on’ when the compressor is ‘in’ or active. Output gain is effectively always on.
Go, compress!
This brief overview will give you some insight to some of the controls often found on dynamics processors out there in the world of recording. Dynamics processing is a whole world within itself so there is plenty more to learn and explore. The greater your understanding of processing audio dynamics, the greater your recordings are more likely to be so, go, explore!
To learn more about making great recordings SUBSCRIBE in the box below
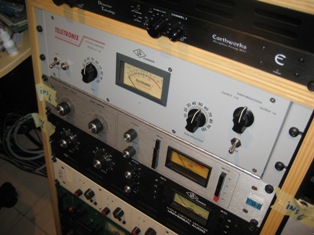
Photo Credit: © Agenda Red
{ 1 comment… read it below or add one }
I just wanted to meonitn something I noticed with using parallel compression in logic pro. I decided to beef up a bass track by sending it to an aux channel (pre fader send) and dirtying it up a little. I like how it sounds, but kept getting a clicking noise at the end of my track. I figured out that it was because I was fading out the original bass channel, but not the parallel channel. Once I also automated a fade out on the aux channel, it sounded smooth. I don’t know how if that kind of routing causes conflicts in other DAW’s, but it’s something to look out for in Logic Pro 9.